Navigation Feature User Guide
This document helps you quickly use the Navigation feature, including voice dialog, device selection, navigation item setup, and waypoint configuration/execution.
1. Quick Start
-
1
Start navigation and localize on the tablet Tablet-side Operation GuideOpen the tablet navigation program and make sure localization is completed (mandatory).Navigation execution will fail if localization is not successful.
-
2
Select voice devicesOn this page, first complete microphone selection (wired or wireless) and Switch Speaker.After plugging/unplugging speaker/microphone or after reboot, click Switch Speaker again.
-
3
Start voice dialog (optional)Click Voice Dialog, then configure wake words in "Voice Settings".If you hear a response after speaking the wake word, voice is active. It enters standby after long inactivity; speak wake word again.
-
4
Run navigationCreate or select a navigation item, then click Execute.Before execution, ensure no other tour is running and tablet navigation is started and localized.
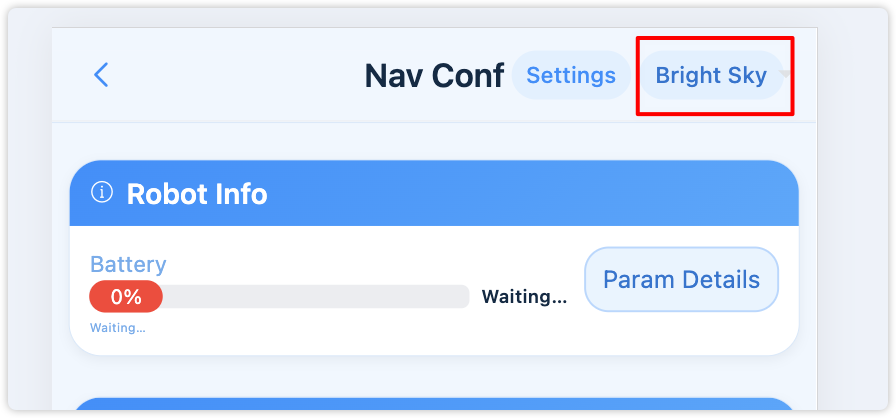
Theme Switch
The top bar provides a Theme Switch button. Click to choose themes (such as Warm Apricot or Sky Blue).
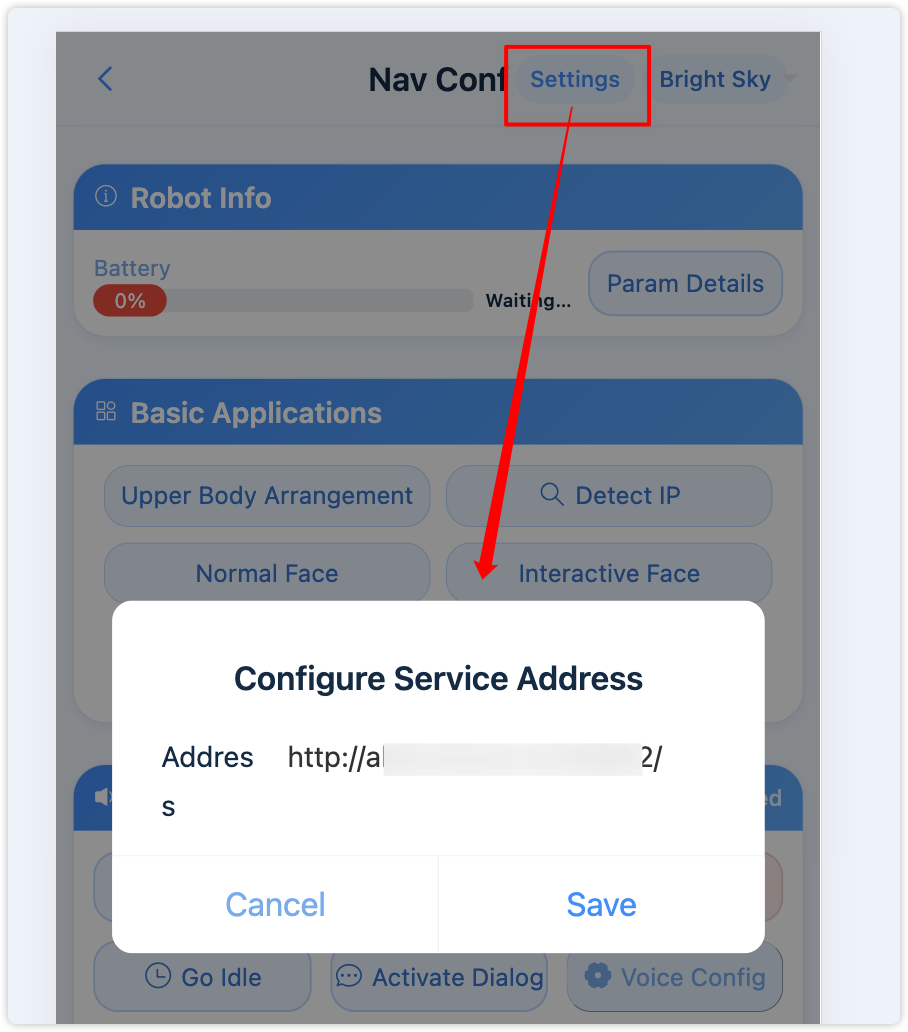
Top Settings (Service Address & Feature Activation)
- Click the top Settings button to configure robot service address (IP/domain).
- On first entry, the system can recommend a default IP based on the current access address and apply it with a countdown.
- You can enter activation codes for features (Dexterous Hand / Interactive Face / Navigation); changes take effect after page reload.
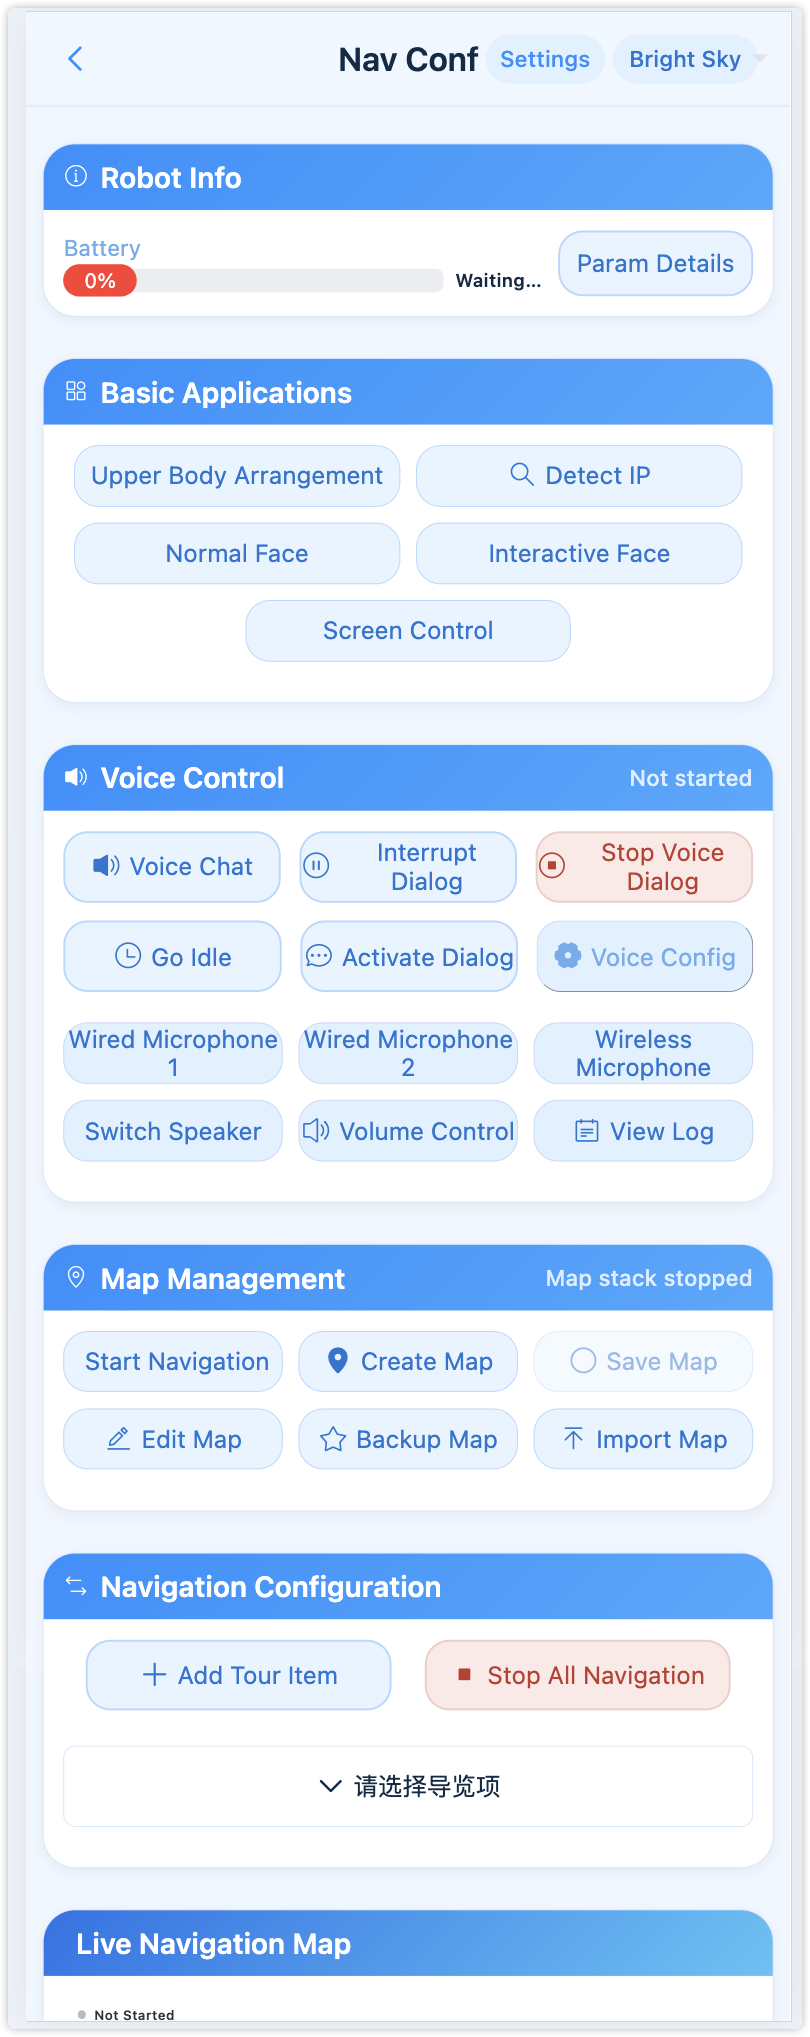
2. Robot Information Module (New)
- Real-time Push: A "Robot Information" module is shown at the top and updates robot status in real time.
- Battery Display: Battery progress bar and percentage are shown for quick power checks.
- Low Battery Alert: When battery is below 20%, the bar turns red and an alert sound is played.
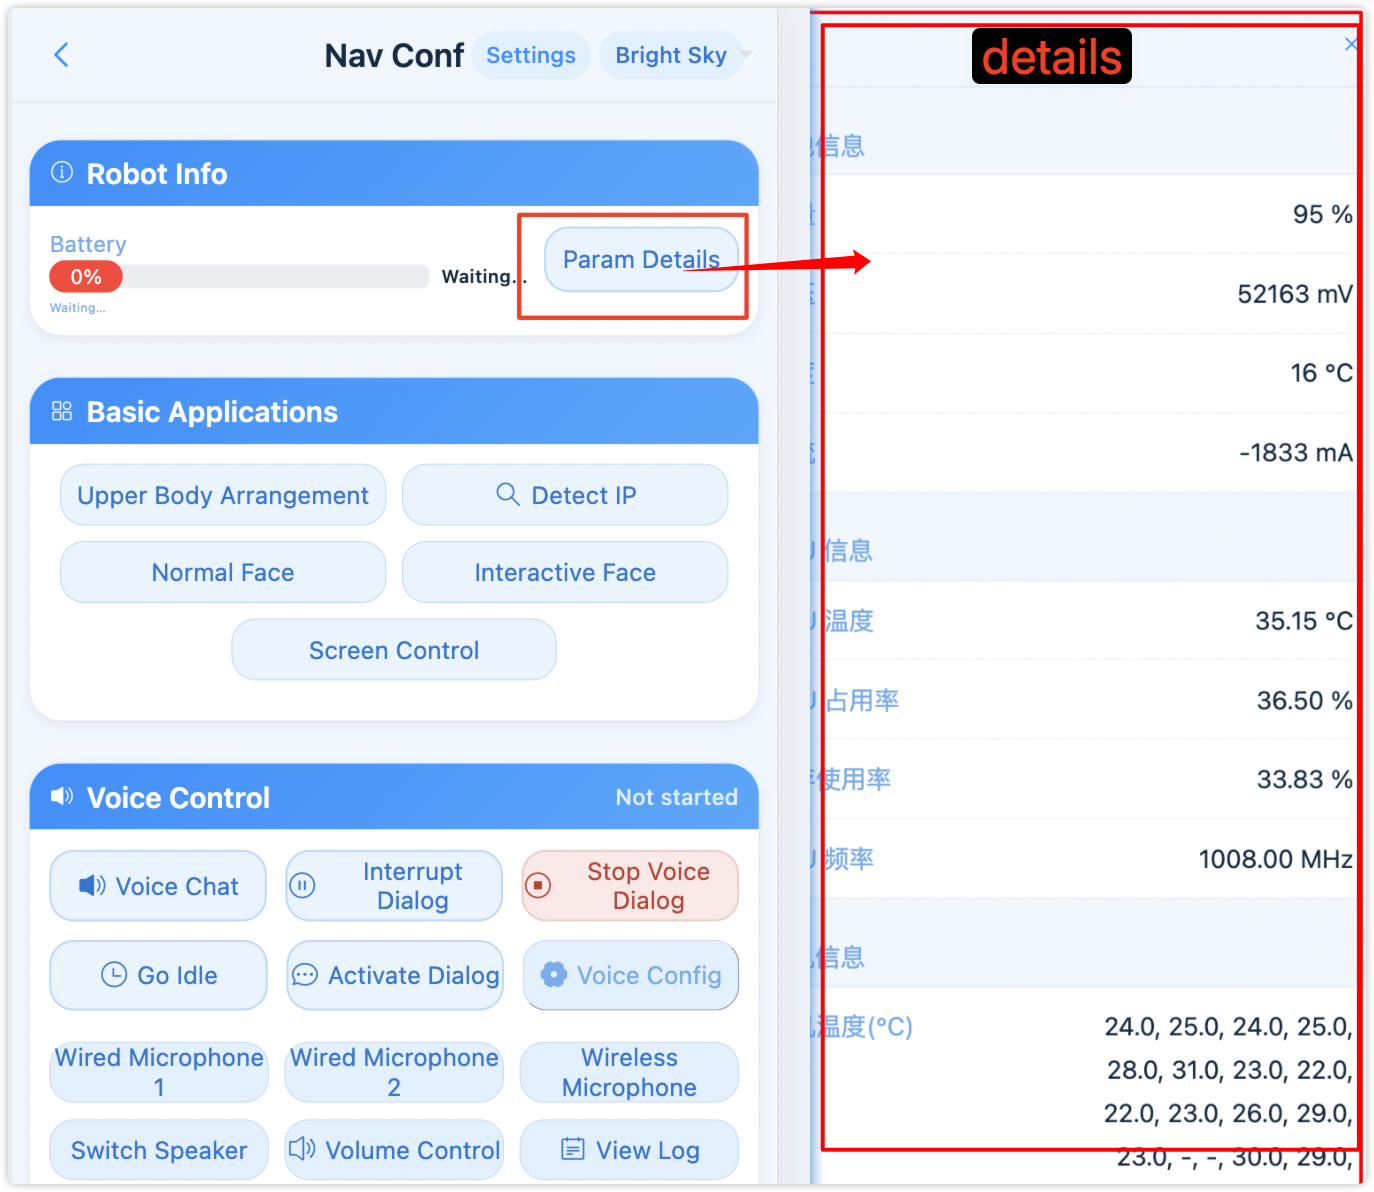
- Parameter Details: Click Parameter Details to view voltage, current, temperature, etc.
- Network Status Linkage: After starting voice dialog, real-time speed and latency appear near the module title.
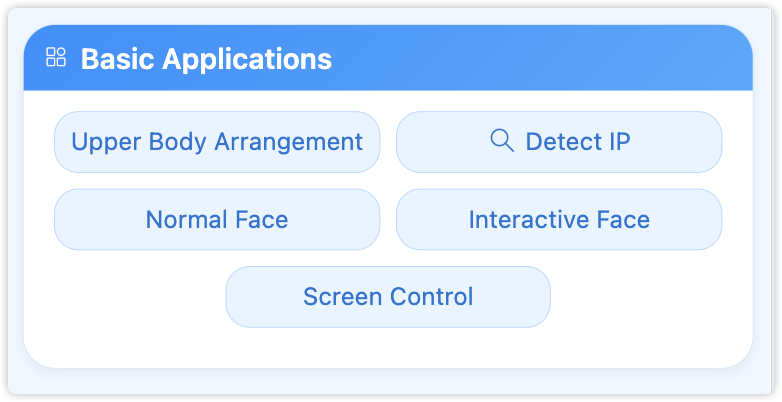
3. Basic Applications
- Upper-body choreography: Enter motion choreography system.
- Check IP: Detect device IP.
- Standard face: Enter standard face recognition.
- Interactive face: Enter dynamic face interaction mode (see "Other Feature Entrances").
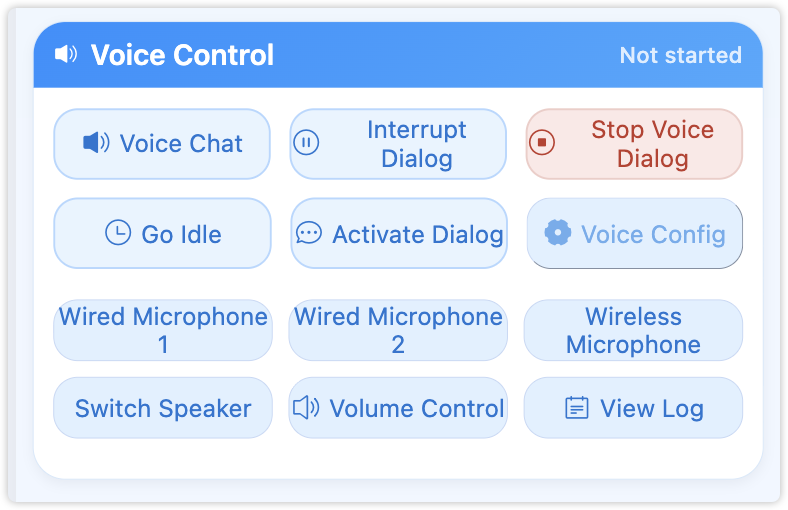
4. Voice Dialog
1) Voice Dialog Controls
- Click Voice Dialog: start robot voice dialog.
- Click Stop Dialog: stop voice dialog.
- Click Interrupt Dialog: interrupt current dialog.
- Click Enter Standby: put AI into standby; dynamic face interaction starts detection in this state.
- Click Activate Dialog: reactivate dialog.
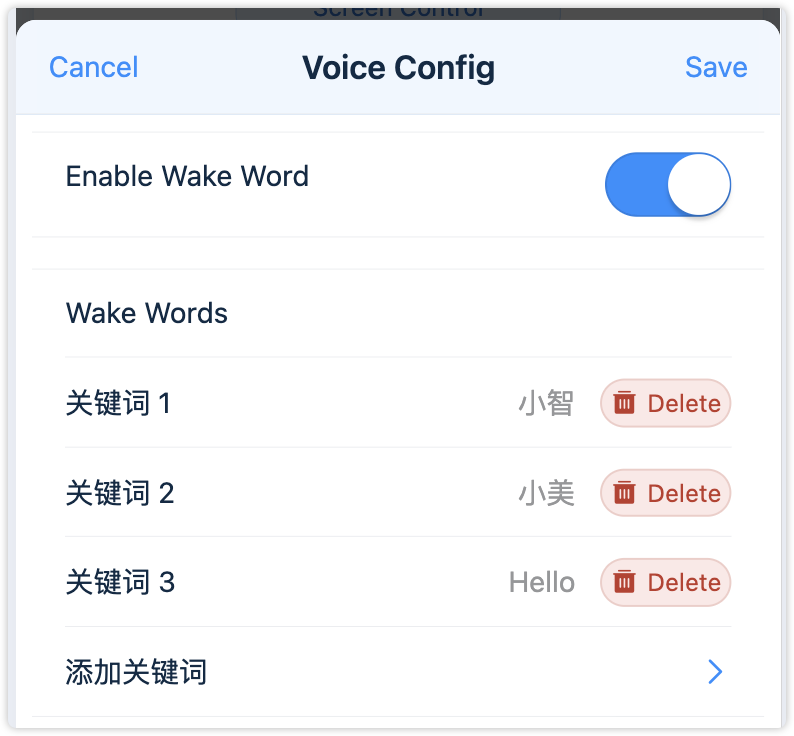
2) Voice Settings and Wake Word
- Click Voice Settings to configure wake words.
- After voice dialog starts, speak the configured wake word to activate dialog.
- After long inactivity, the system enters standby and must be reactivated by wake word.
3) Notes for Voice Dialog
- Click View Logs to enter voice log details page (supports real-time refresh and scrolling).
- The voice log page filters network-monitor lines and limits total lines to avoid lag during long sessions.
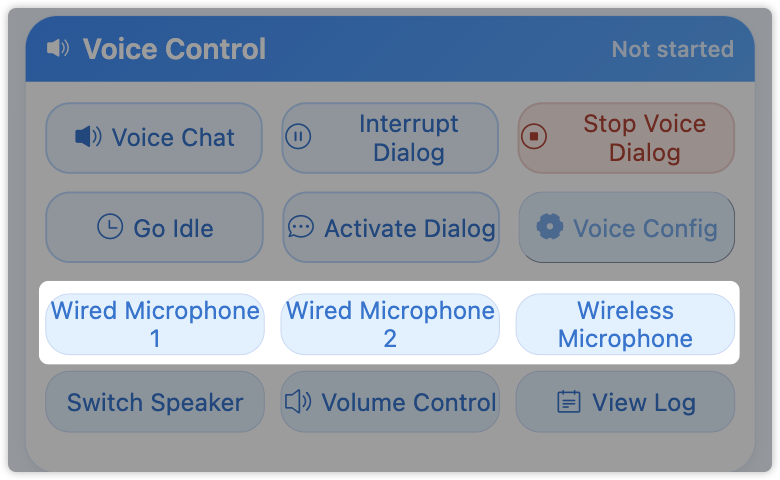
5. Device Selection (Microphone & Speaker)
- Click Wired Mic 1 / Wired Mic 2 / Wireless Mic to switch mic input. The selected mic shows a blue checkmark.
- Click Switch Speaker to switch output device.
6. Map Management
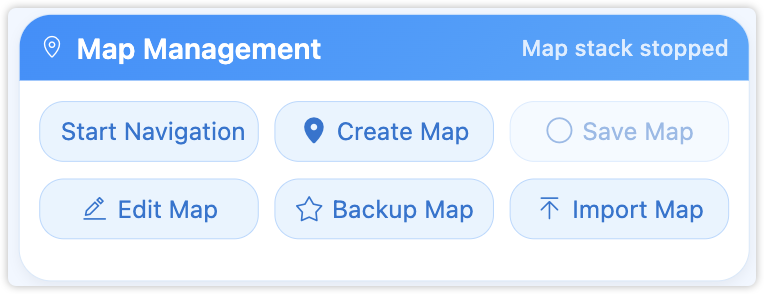
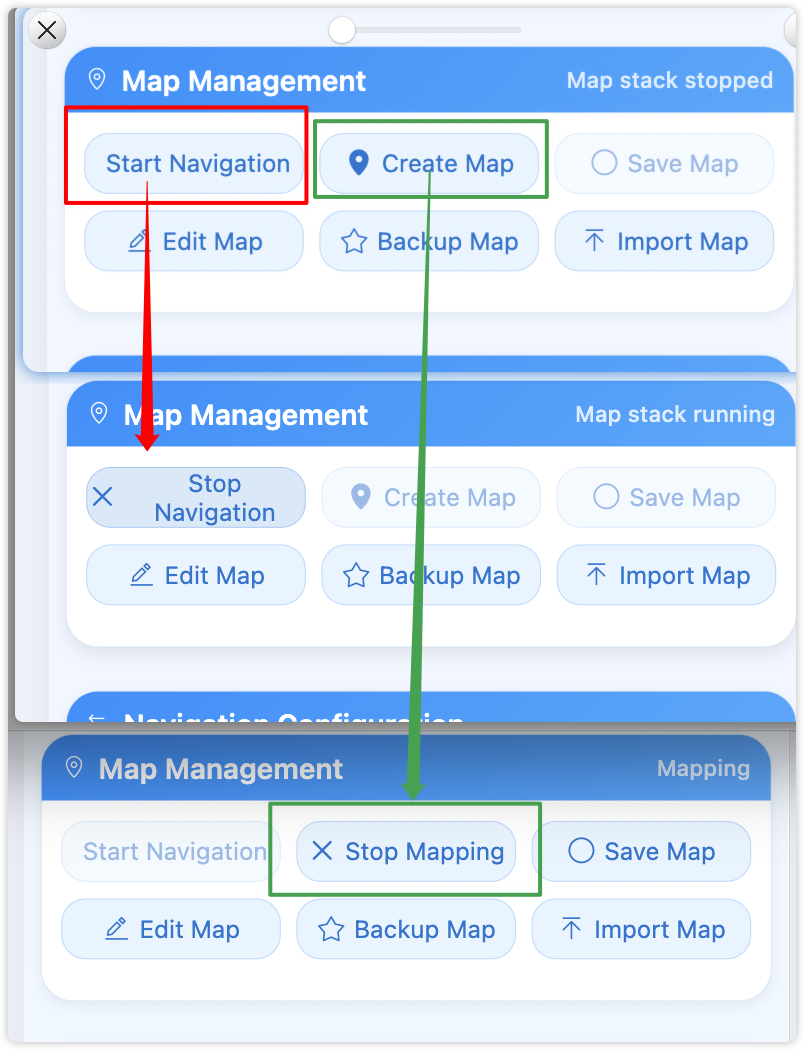
1) Start Navigation / Stop Navigation (New)
- Click Start Navigation to launch navigation on desktop (same as double-clicking desktop shortcut).
- Click Stop Navigation to stop desktop navigation and stack.
- Click Create Map to enter online mapping with real-time point cloud and pose view.
Create Map Page (enter via "Create Map")
- Opens full-screen mapping view with real-time map, point cloud and pose changes.
- Supports drag to pan and two-finger zoom for detailed inspection while scanning on site.
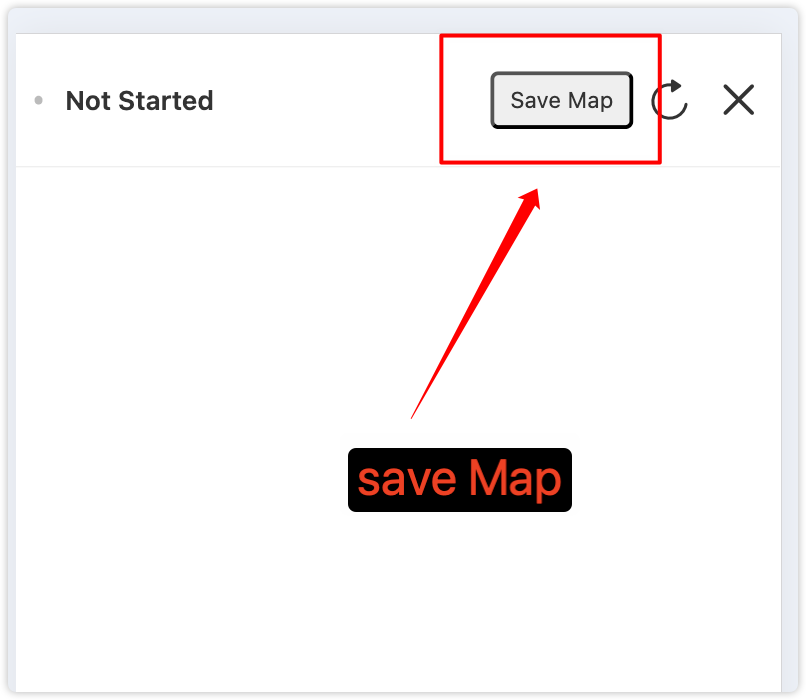
- The top bar provides Save Map; no need to exit before saving.
- Complete full-area scan and verify wall closure before saving.
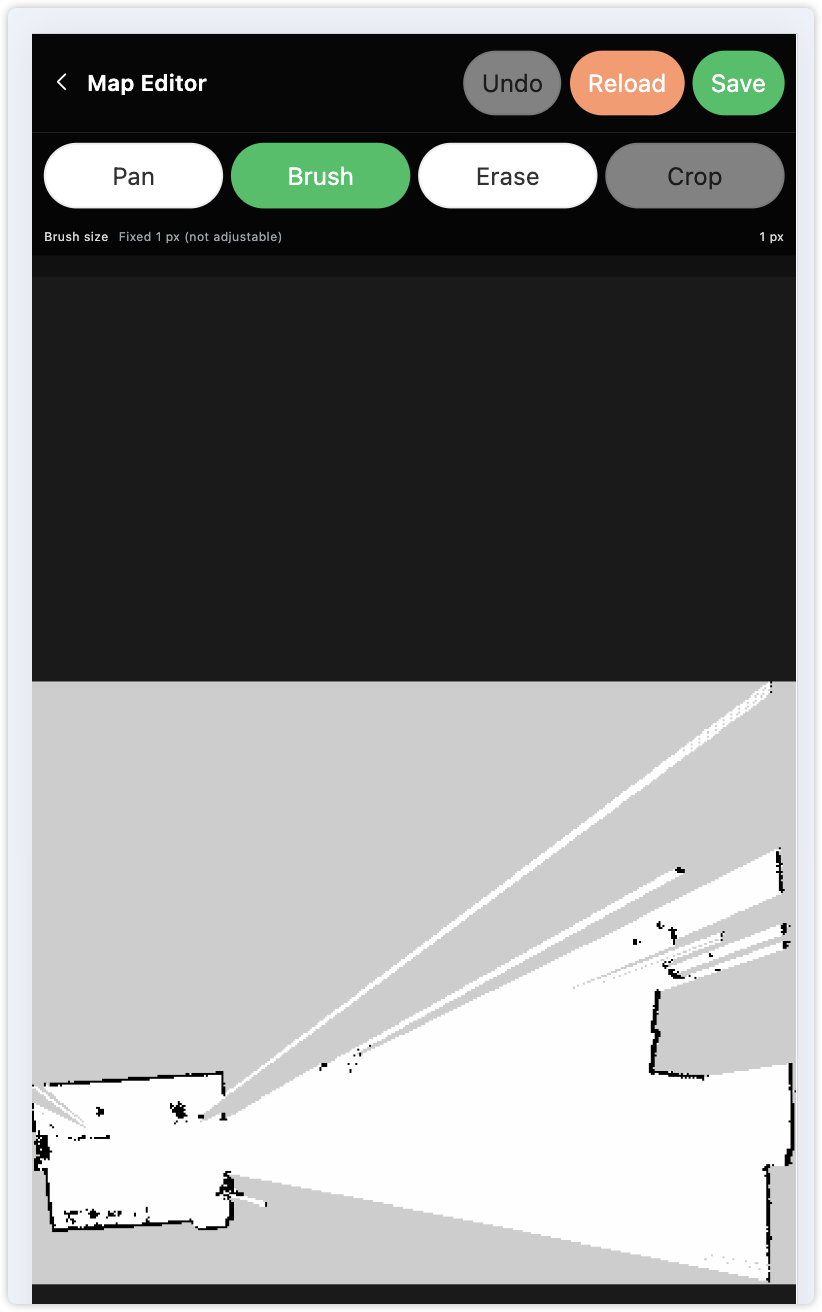
Edit Map Page (enter via "Edit Map")
- Pan mode: browse map without modifying grid data.
- Erase mode: clean noise and temporary obstacles; drag for continuous erase.
- Draw obstacle mode: add fixed obstacle boundaries (use cautiously).
- Cursor/brush size: adjustable in erase mode (pixels); test small area first.
- Undo / Reload / Save: undo previous edit, reload original map, and save current edits.
- Crop function: currently disabled; do not rely on it for formal editing.
2) Save Map
- Click Save Map and confirm to save current map.
- Map results are saved to system storage. Always save map first after mapping is complete.
3) Backup Map
- Click Backup Map to open the backup dialog.
- Enter a backup name (must be unique).
- Click "Start Backup" in top-right. The system backs up:
- Map files (map directory)
- Config files (config directory)
- Path files (path directory)
- Point cloud files (PCD directory)
- After completion, all backups (name and creation time) are visible in backup list.
4) Import Map
- Click Import Map to open import dialog.
- Select a backup record in the list (or click "Select Backup").
- After confirmation, click "Start Import" in the top-right corner.
- Confirm prompt; all map-related data of selected backup will be restored automatically.
- Current map/config/path/point-cloud data will be replaced by backup content.
5) Delete Backup
- In backup dialog, click the Delete button at the right side of a backup record.
- Deletion is irreversible. Proceed with caution.
7. Navigation Items
1) Add Navigation Item
- Click + Add Navigation Item.
- Set Chinese Name, English Name (letters only), trigger keyword, and description.
- After saving, the item is created and enabled by default.
2) Trigger Keywords
When voice dialog is active, speaking the configured keyword in conversation triggers auto-start of that navigation item (navigation must be started and localized on the computer first).
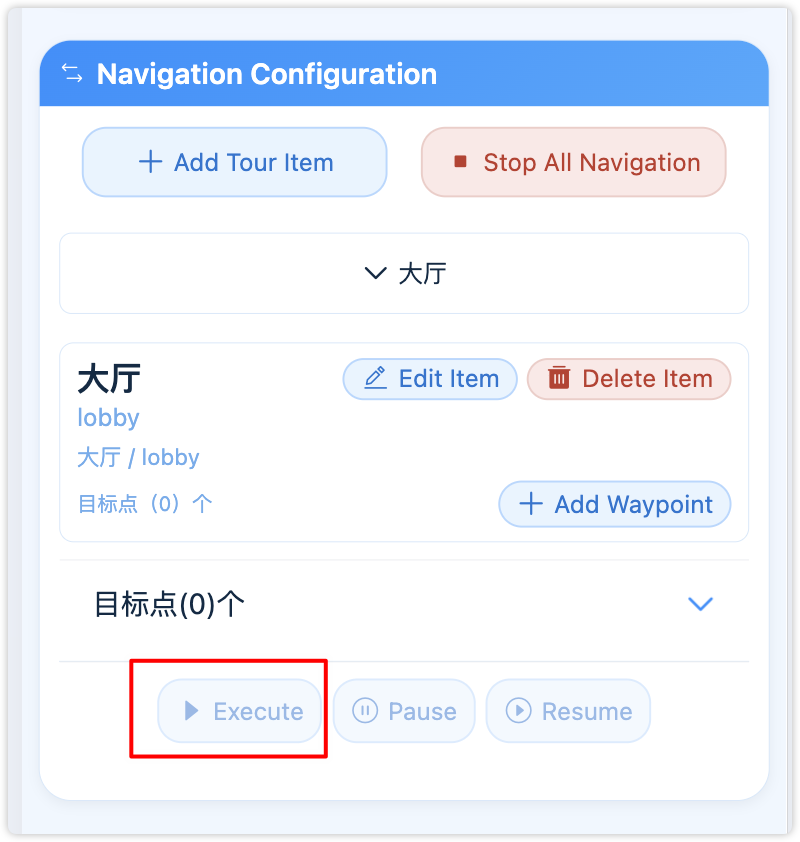
3) Edit / Delete / Execute
- After expanding an item, you can edit or delete it.
- Click Execute to run this item.
- Before execution, click Start Navigation in Map module and confirm localization success.
- Also confirm no other item is running and tablet navigation is started/localized.
- During execution, use Pause and Resume for control.
- Click Stop All Navigation to stop current tours and desktop navigation.
8. Waypoints
1) Add and View
After expanding a navigation item, you can add multiple waypoints (single-point or multi-point; make sure map is started and localization succeeds first).
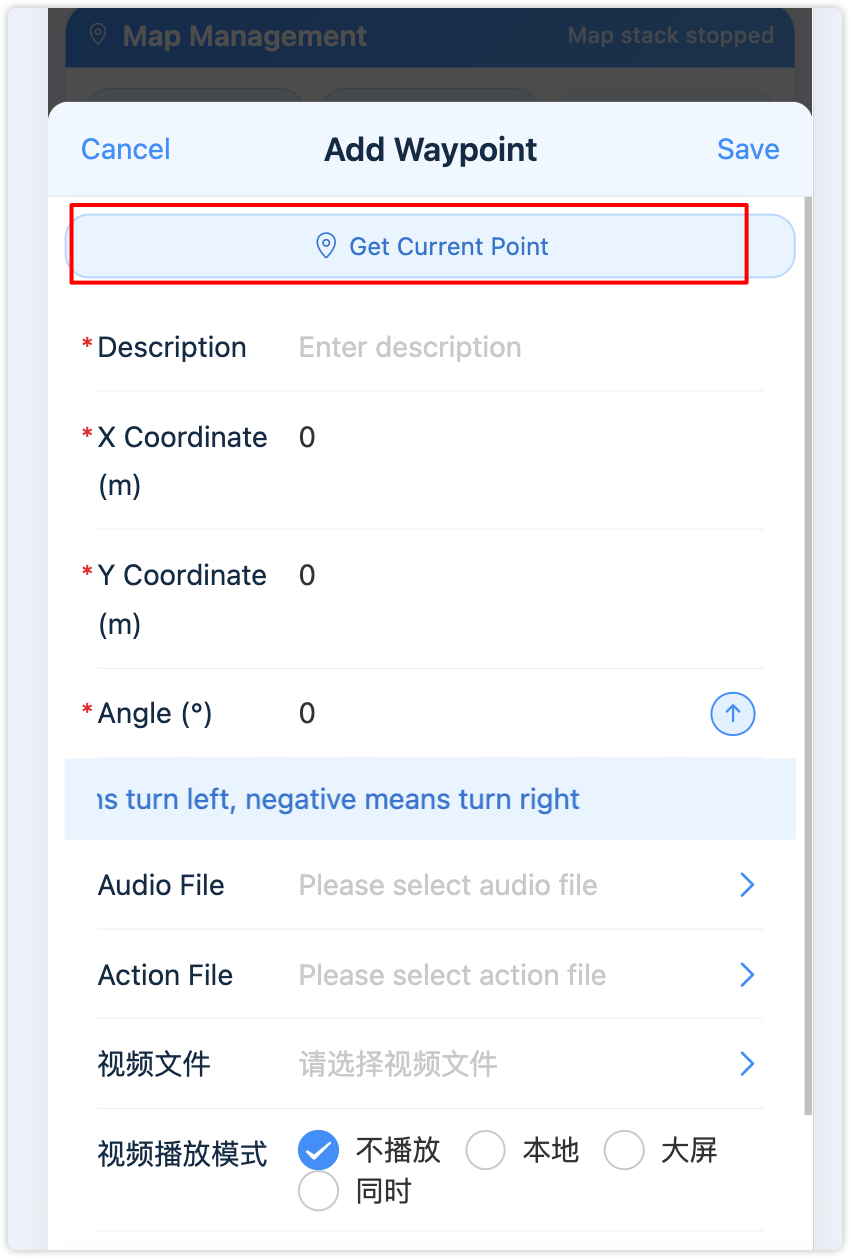
Recommended method: Move robot to target waypoint and click Get Current Position in waypoint editor to auto-fill X/Y/angle.
- Move robot to target position and confirm facing direction.
- Open waypoint edit dialog.
- Click Get Current Position to auto-fill coordinates and angle.
- Review and save.
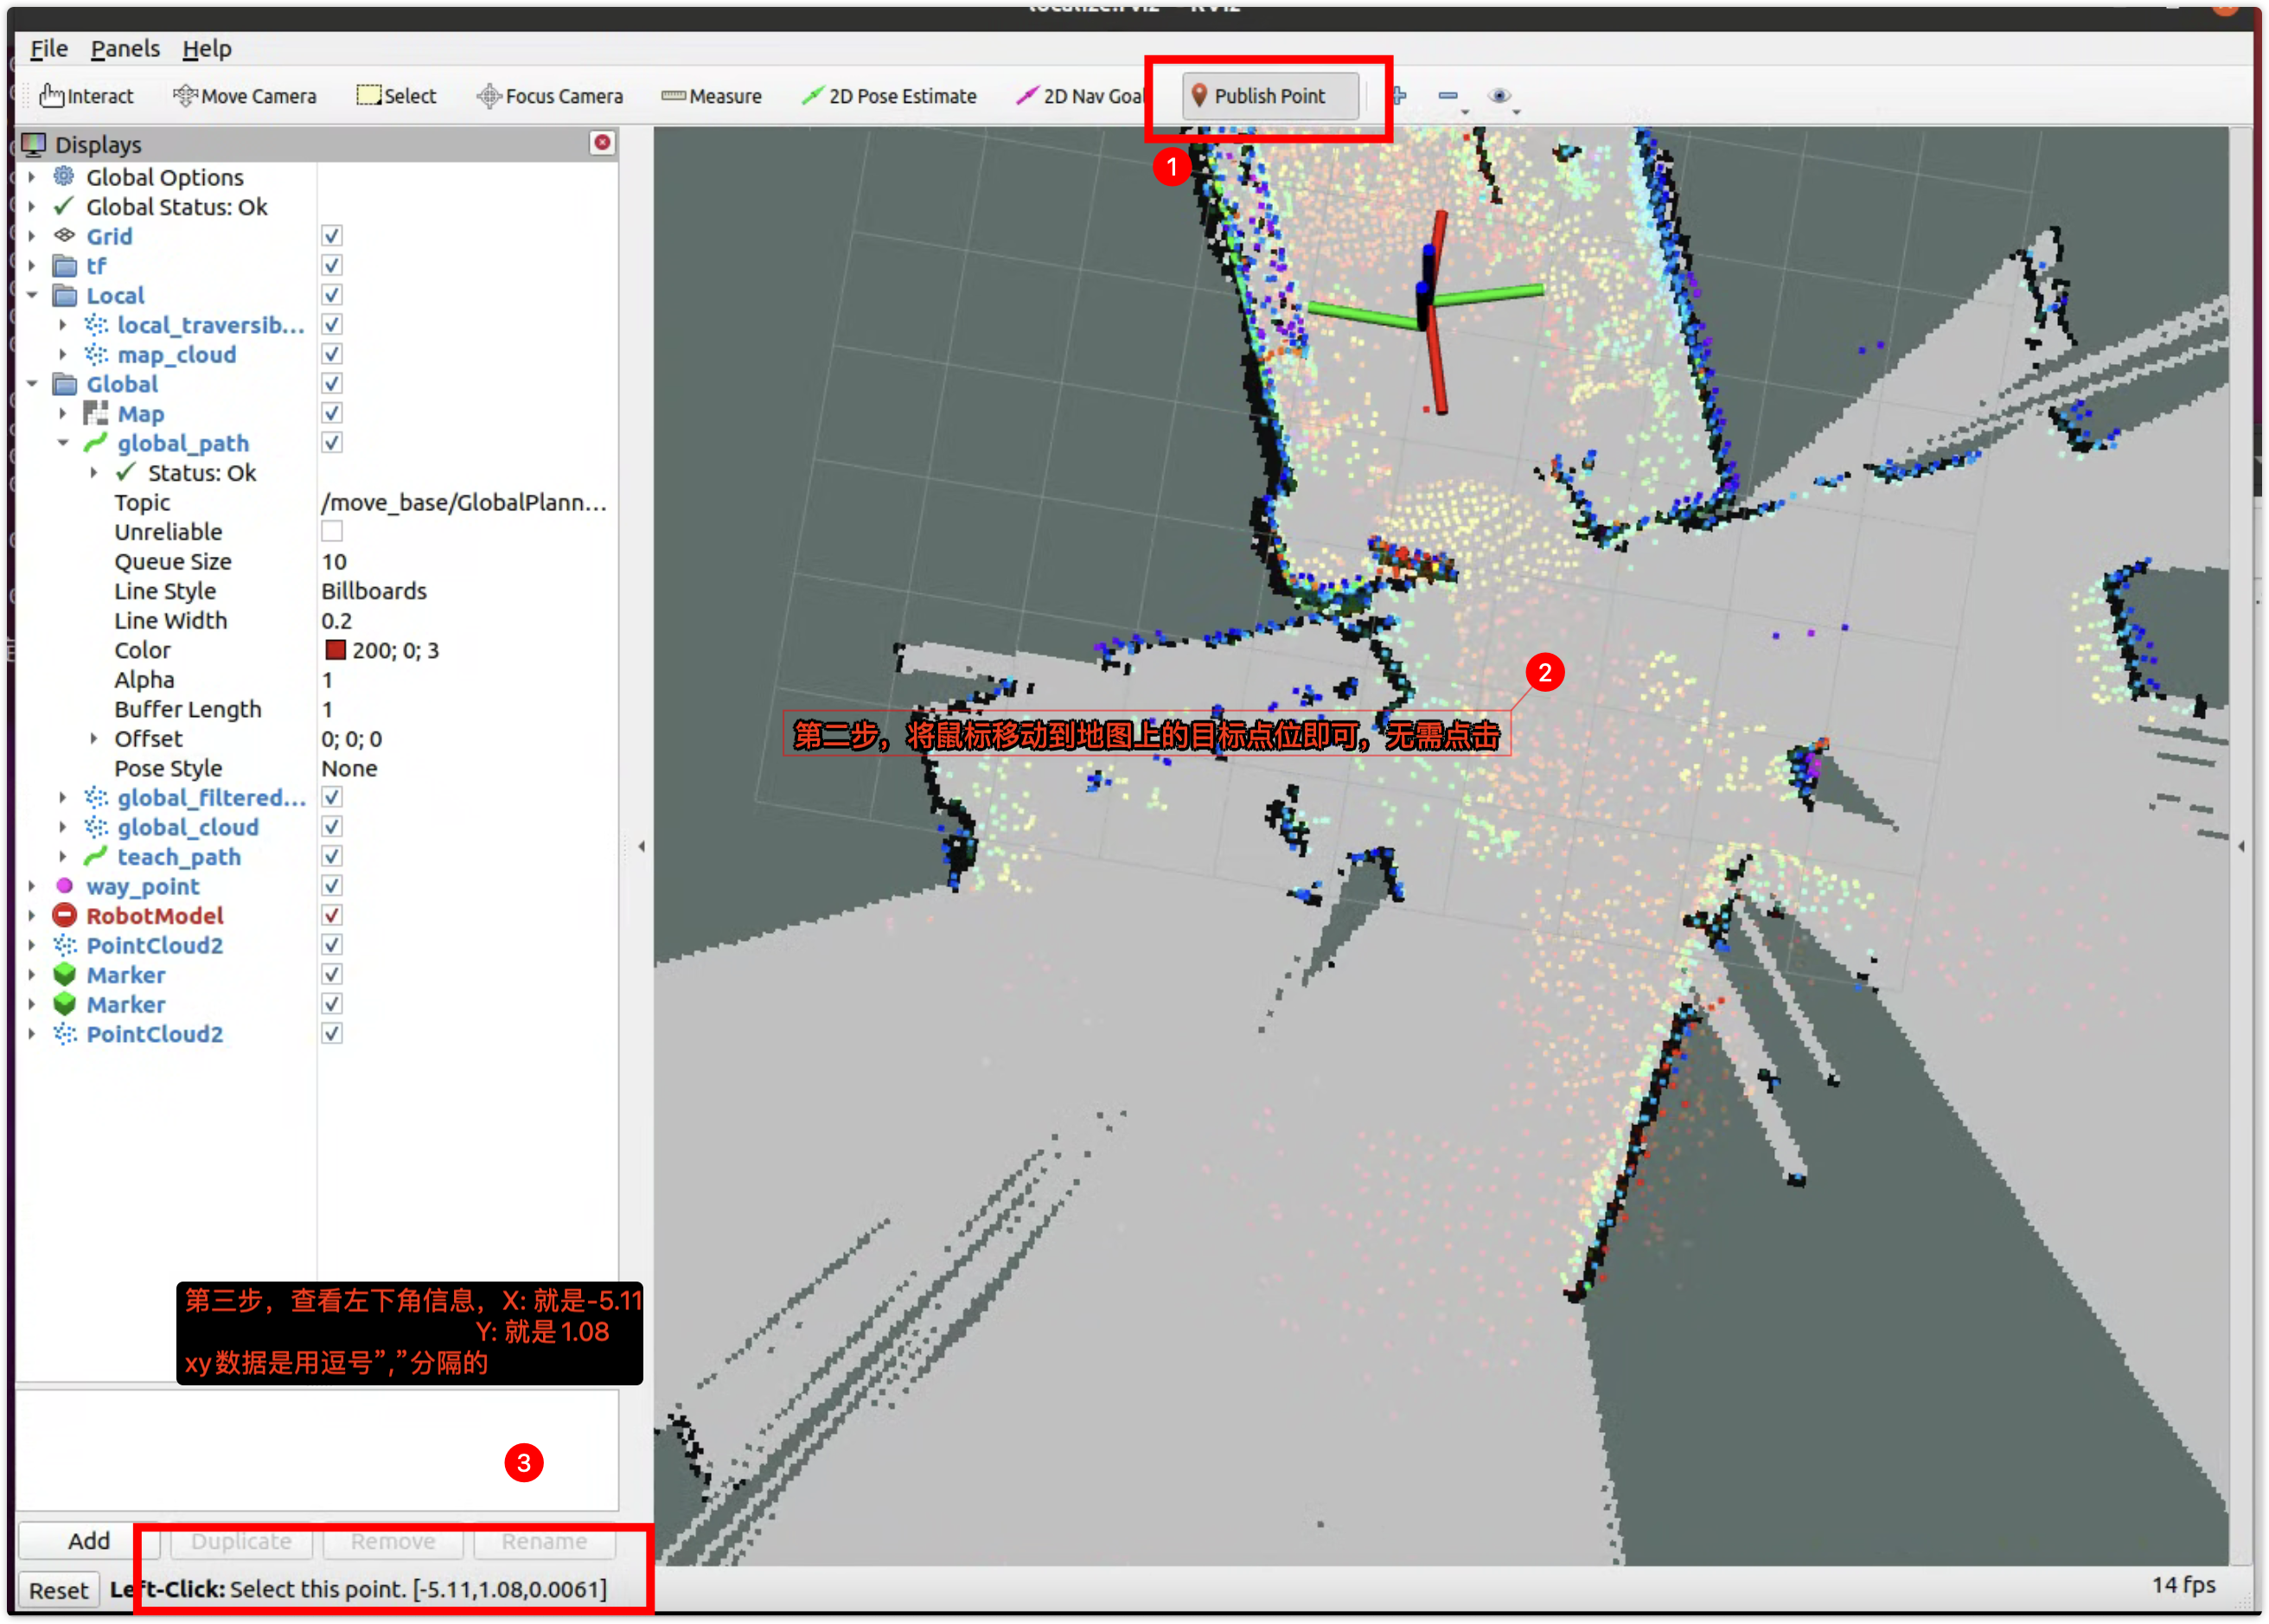
Alternative method: Read coordinates via Publish Point in navigation view and fill manually.
- Click Publish Point on toolbar.
- Move mouse to target point on map (no click required).
- Read X/Y in lower-left coordinate area and fill manually; enter angle according to on-site pose.
2) Parameter Description
- X / Y / Angle: required. Recommended to auto-fill via "Get Current Position", or manually via Publish Point. Angle range: -180 to 180.
- Wait Time (sec): optional. Robot wait duration after arrival; should match audio/action duration if possible.
- Audio File: upload MP3 for auto-play on arrival; if no sound, click "Switch Speaker".
- Video File: upload one video file; saved as waypoint video resource and played by selected mode.
- Video Play Mode: supports "None / Local / Big Screen / Both". If unset after upload, default switches to "Both".
- Video Title: optional title shown on big screen.
- Action File: choose action to execute on arrival; finger timelines can be configured in choreography tools.
- Description: text note for this waypoint.
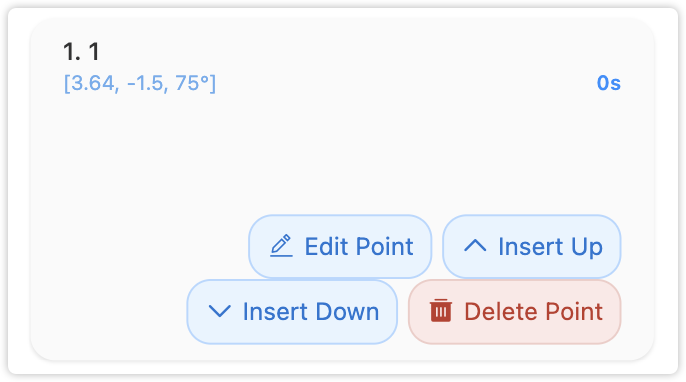
3) Edit, Insert, and Delete
Each waypoint card provides these actions:
- Edit: edit all waypoint parameters (coordinates, angle, wait time, audio, action, description).
- Insert: duplicate current waypoint and insert above or below.
- Click upper-arrow insert icon to insert a duplicated waypoint above.
- Click lower-arrow insert icon to insert a duplicated waypoint below.
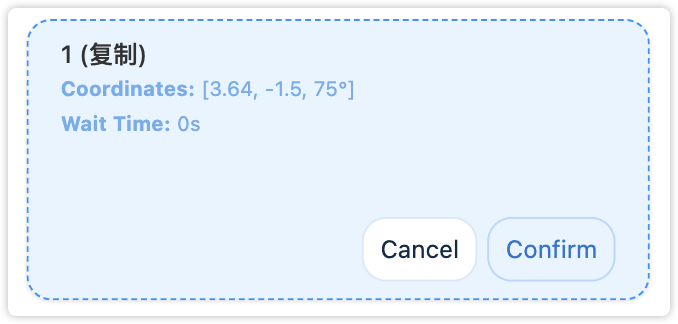
- Duplicated waypoint copies X/Y/angle, wait time, and description. Wait time resets to 0; audio/video/action are emptied; video mode resets to "None".
- After insertion, a blue-dashed preview card appears with Cancel and Confirm.
- Click Confirm to save insertion to backend.
- Click Cancel to cancel insertion.
- Delete: delete this waypoint (with confirmation).
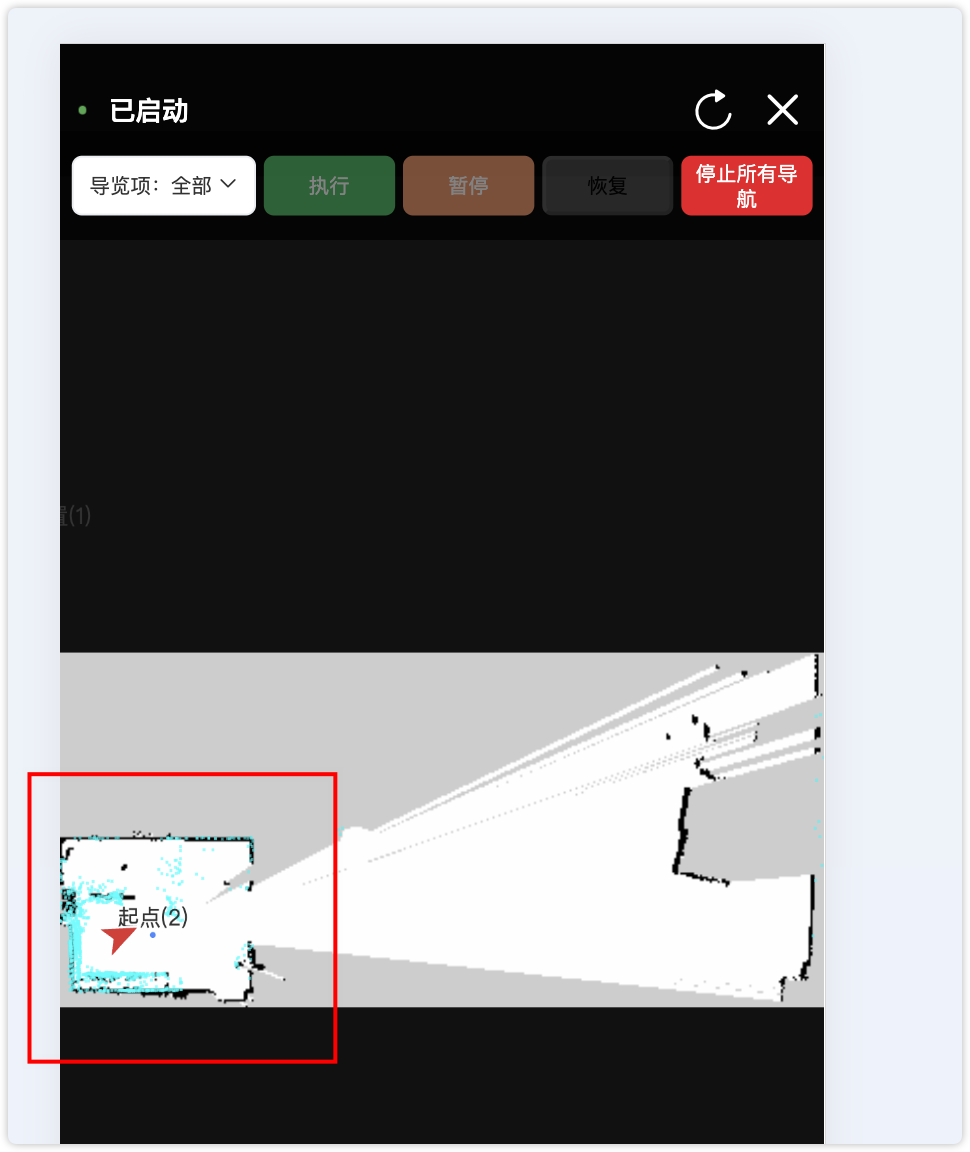
9. Live Navigation Map (New)
- The page bottom provides a Live Navigation Map module to view status, progress, route, point cloud, and robot pose.
- When no navigation is running, all waypoints are shown; different items use different colors and sequence labels.
- Click map to enter full-screen mode; supports rotation, drag, and pinch zoom.
- In full-screen mode, you can execute, pause, resume, or stop navigation directly.
- The full-screen mapping page also supports real-time mapping preview and direct map saving.
10. FAQ
- Execution failed: start navigation and localization on tablet first; ensure no other item is running.
- No voice response: confirm "Start Voice" was clicked; check mic selection and speaker switch; switch speaker again after replugging devices.
- No sound: click "Switch Speaker" and retry; confirm audio file exists and format is correct.
- Waypoint video not playing: check video file upload and ensure play mode is not "None"; for big-screen mode verify big-screen service status.
- Keyword invalid: check wake-word settings in "Voice Settings"; wake again after standby.
Tablet-side User Guide
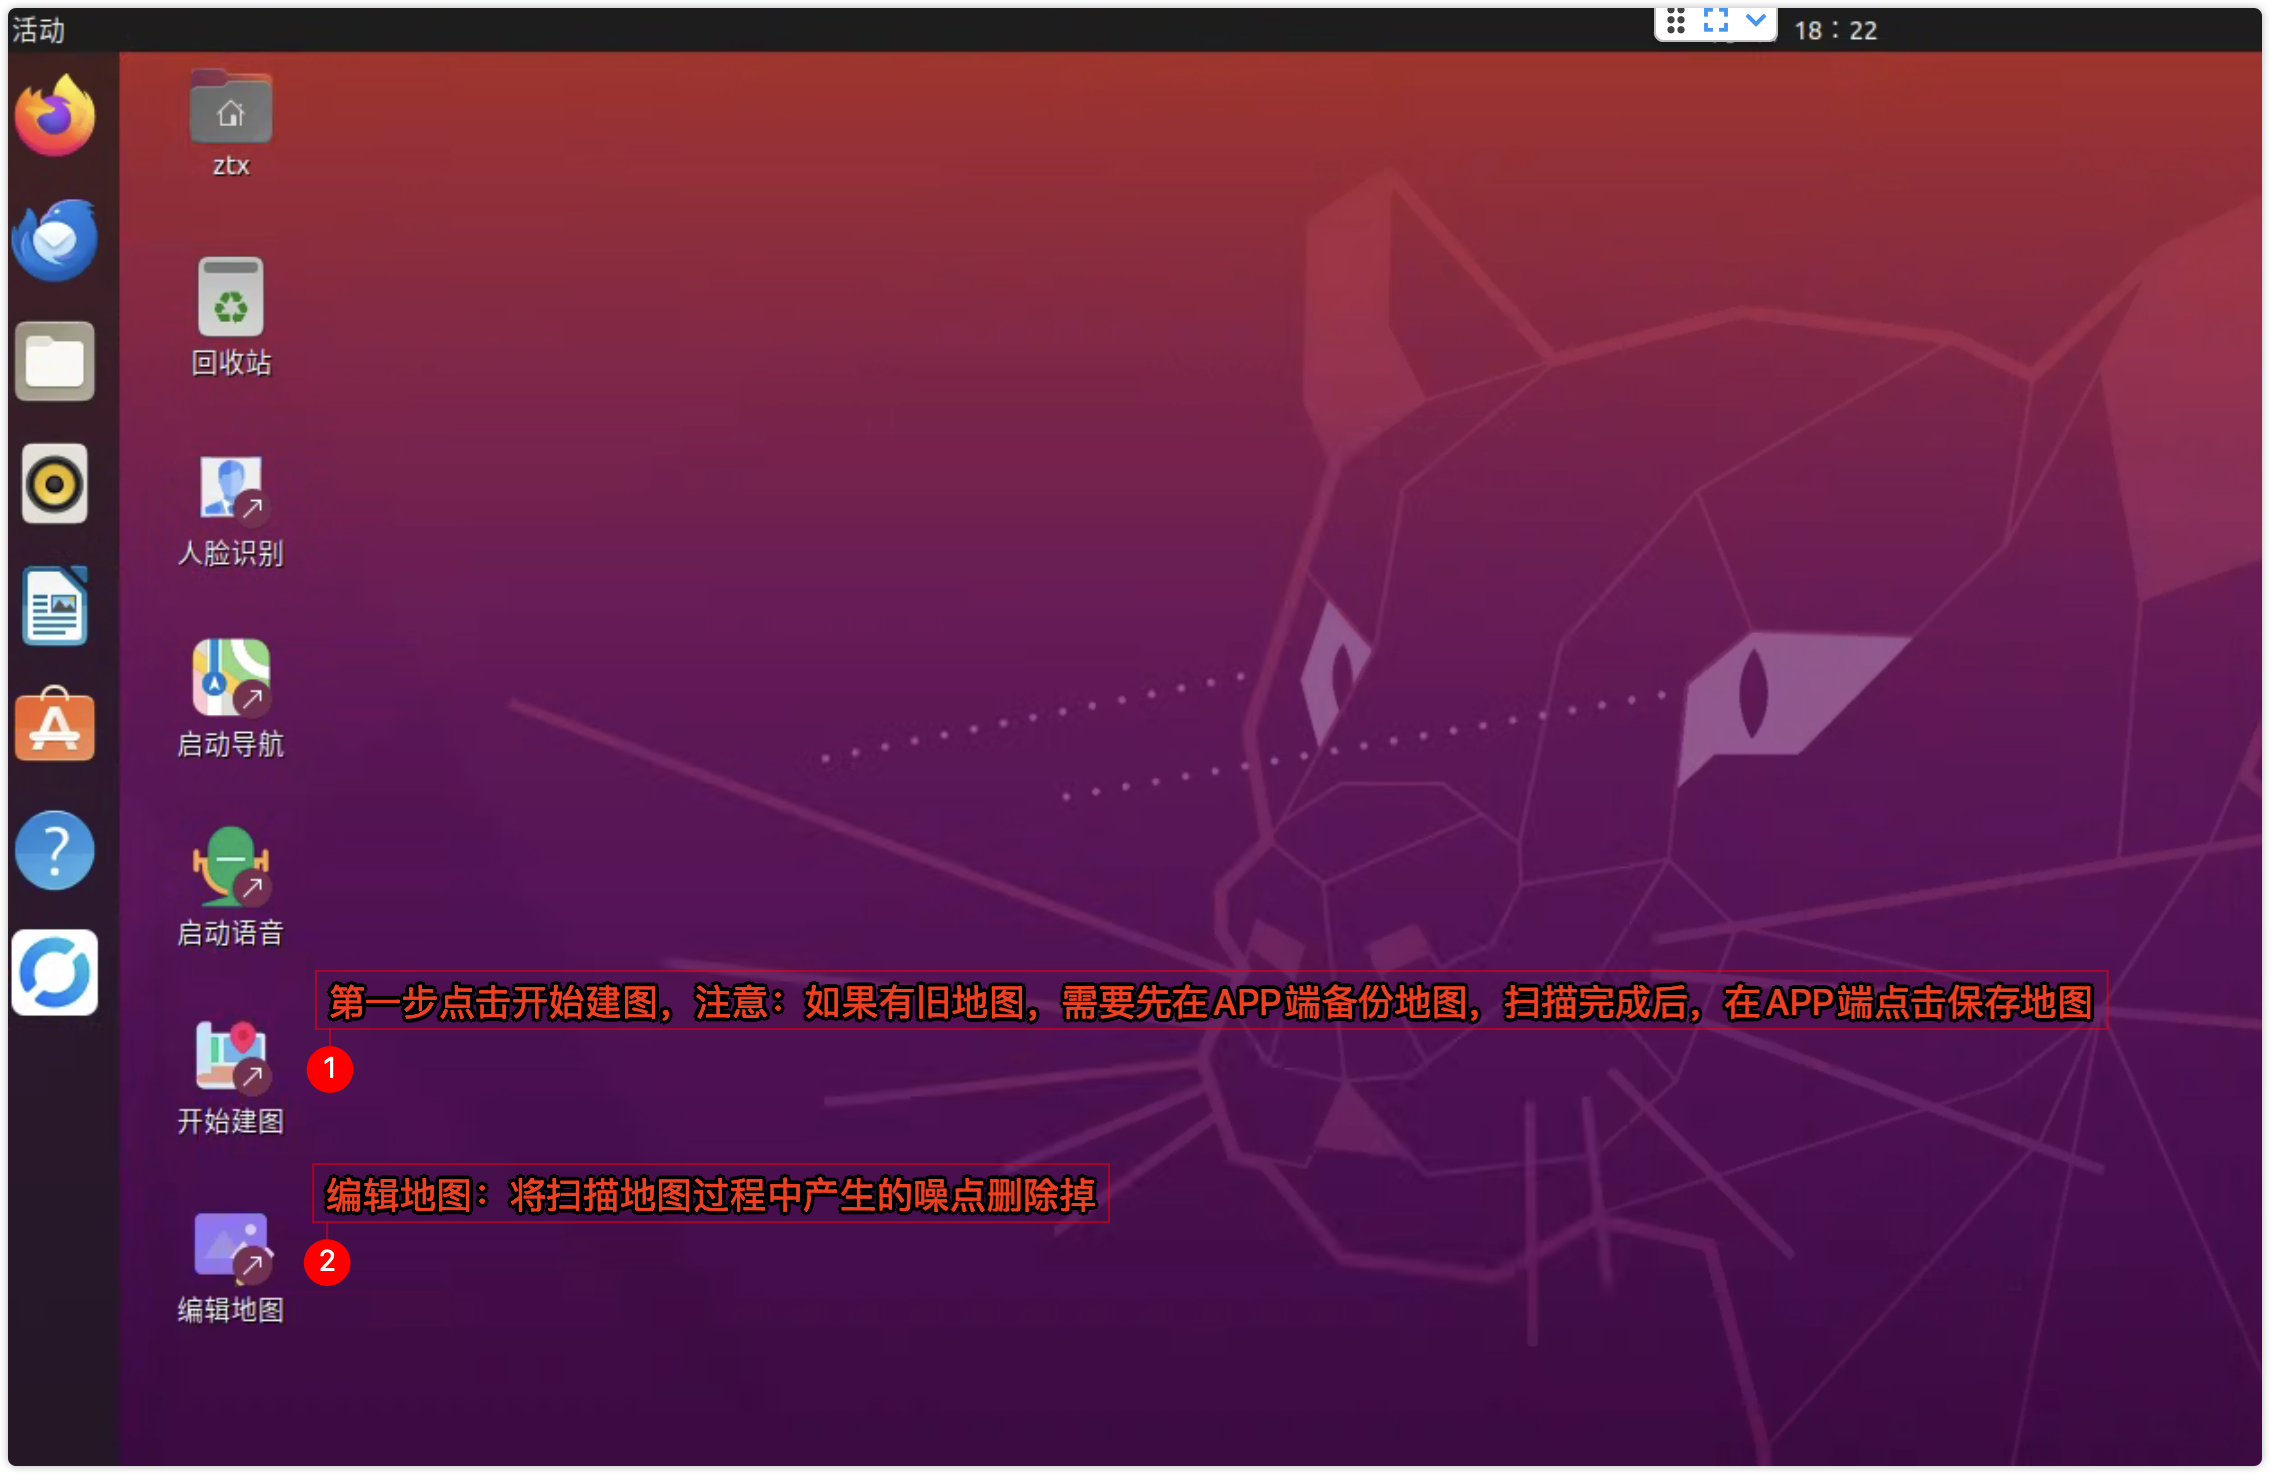
Feature 1 Start Mapping (scan and build scene map)
You must start mapping before first-time use. Click "Start Mapping" on tablet desktop, move robot, and the system scans/builds map in real time.
- Use regular locomotion control mode.
- Keep doors open while mapping (during navigation they may be open or closed).
- Prefer starting mapping/localization at places with three walls around.
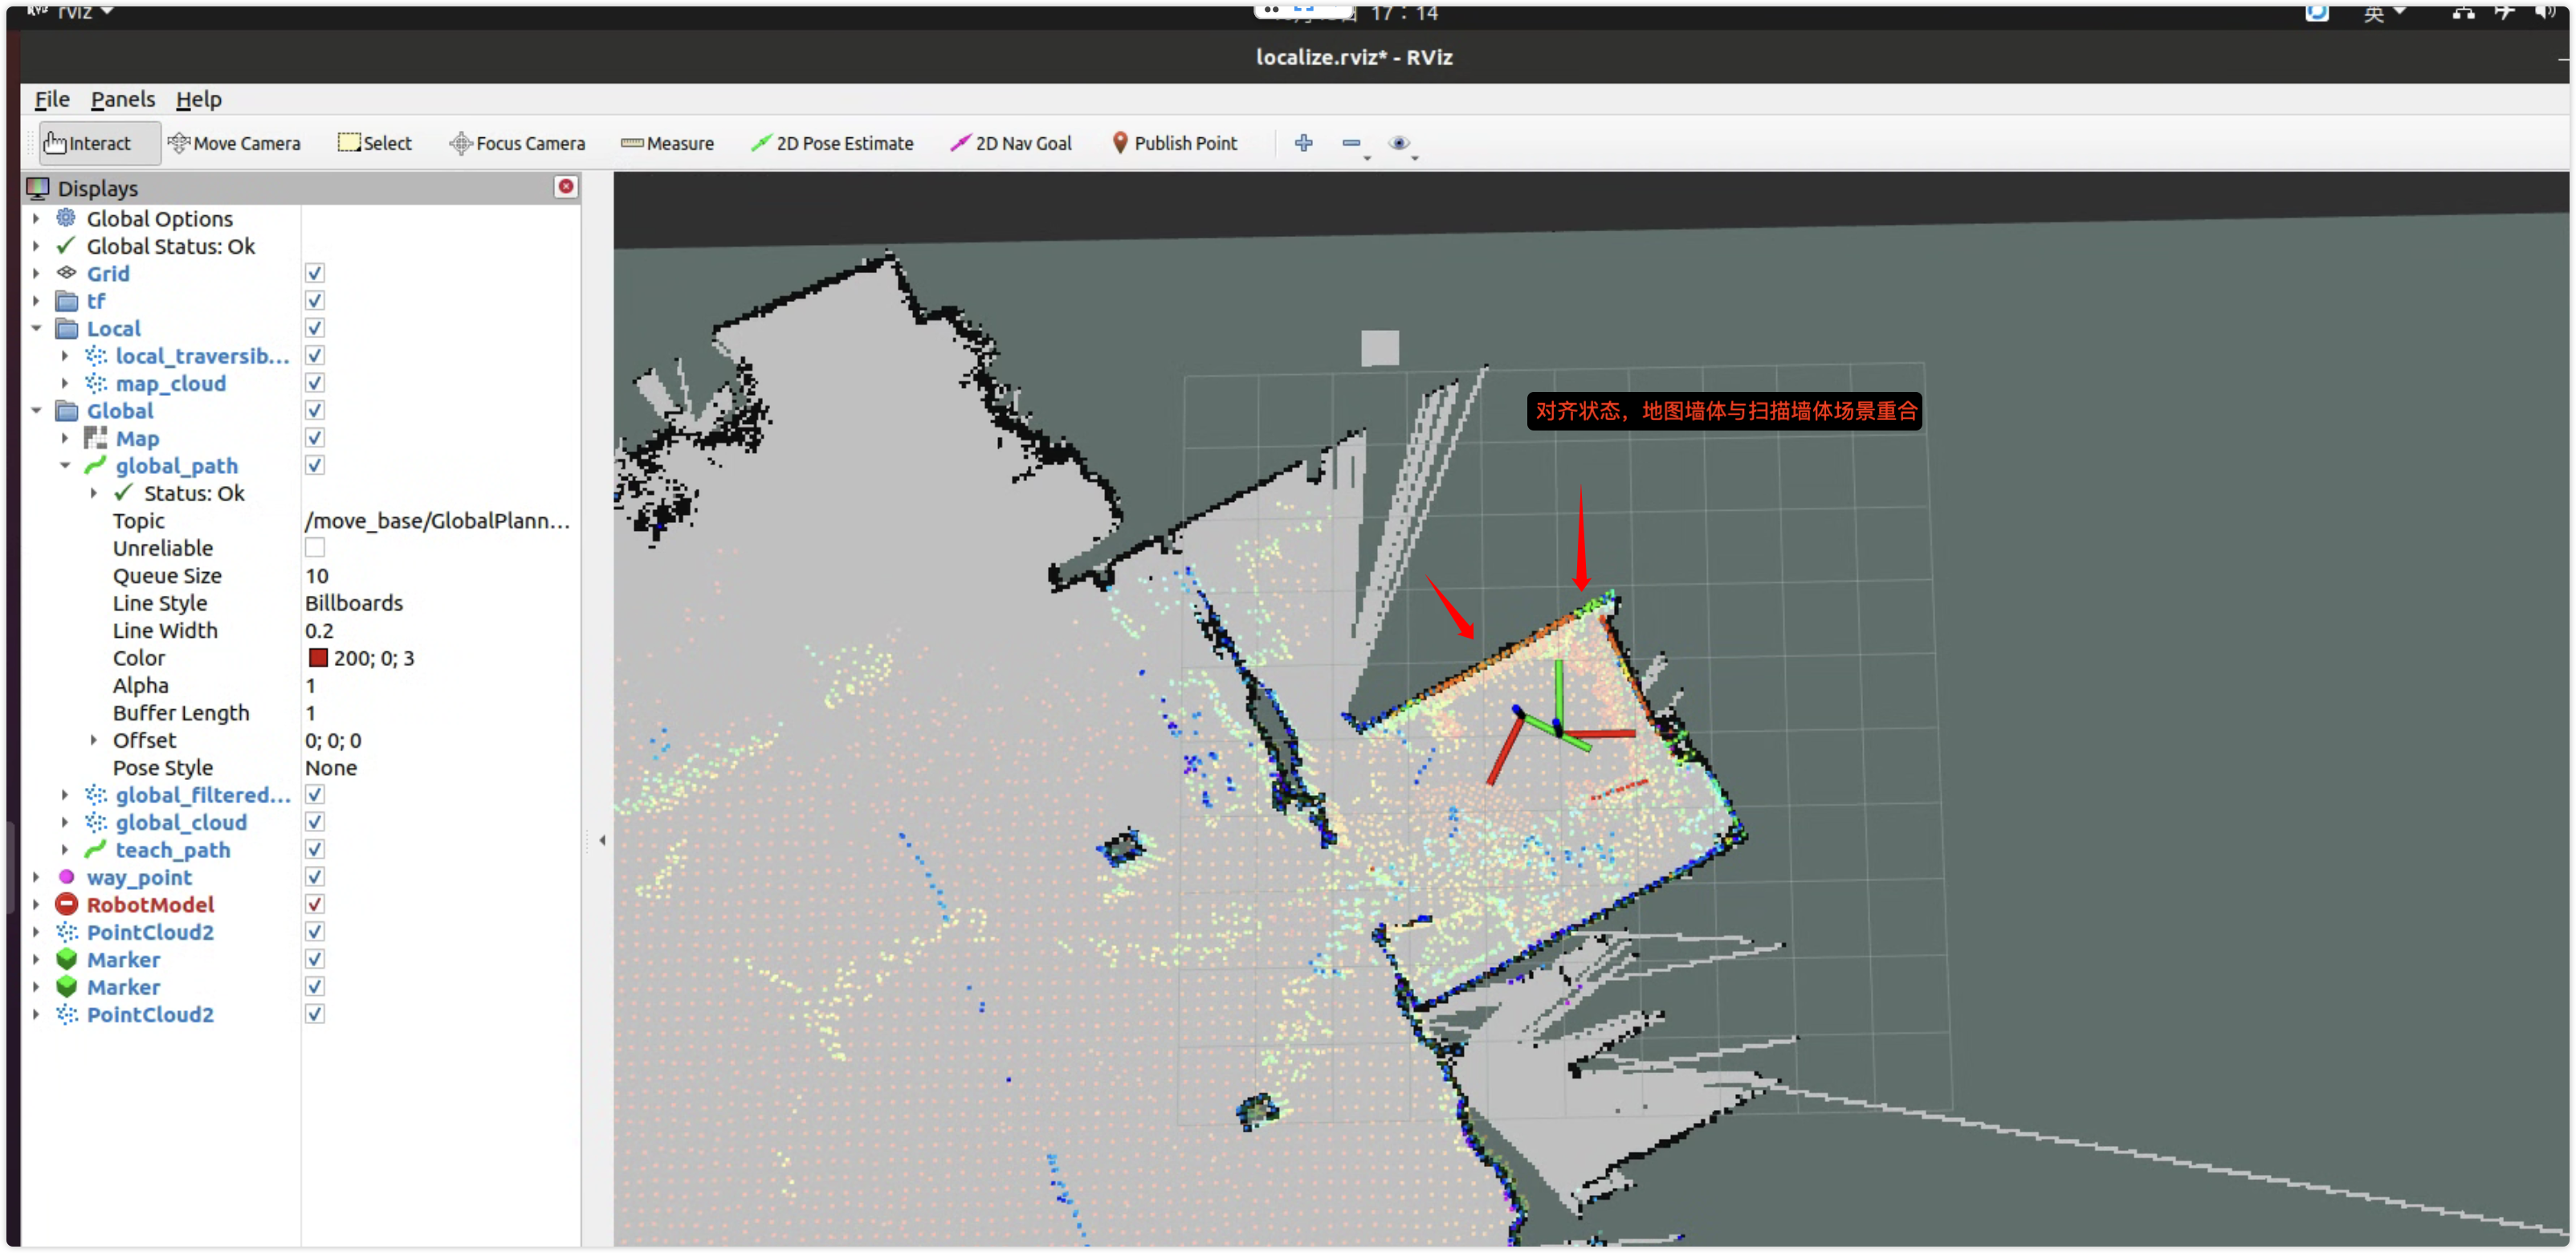
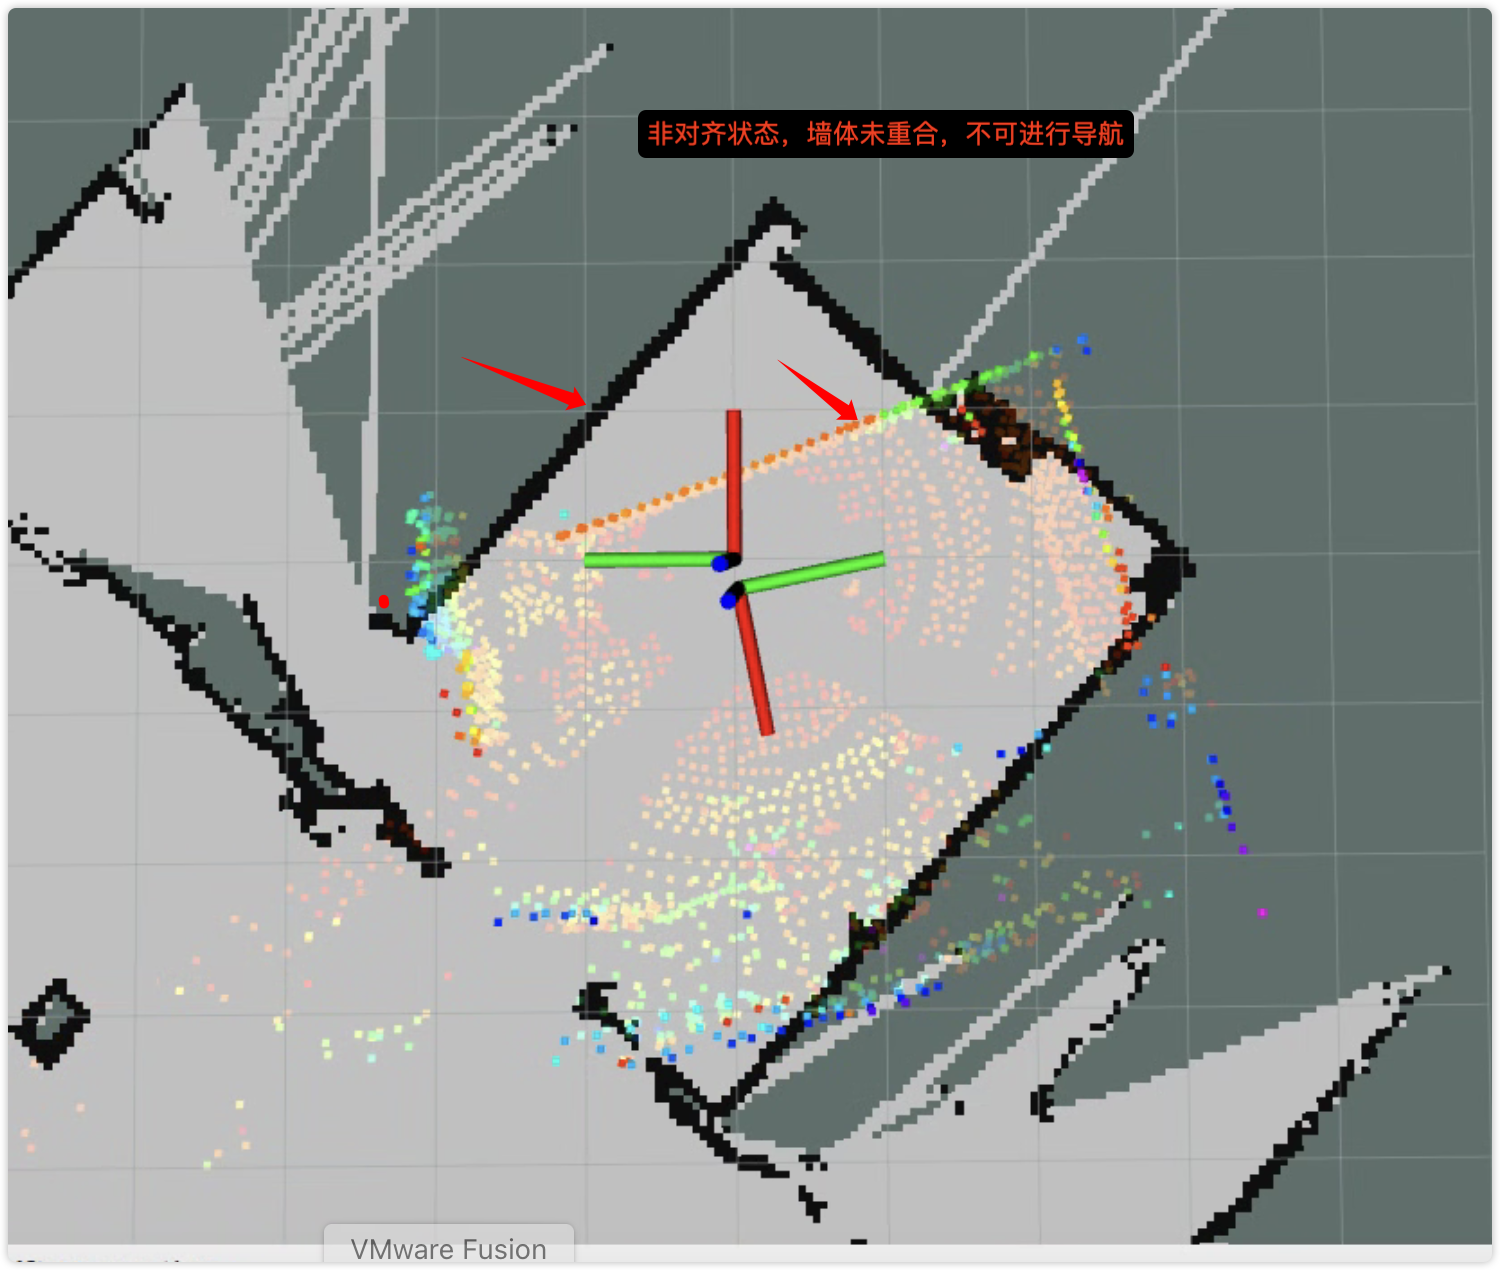
- Watch screen in real time to avoid map drift (point cloud not overlapping walls indicates drift).
- Scan as complete as possible and ensure map boundary is closed.
- Keep map clean: remove movable obstacles and bystanders; operator should stand near wall and avoid random walking.
- Move slowly and uniformly; reduce repeated back-and-forth; prioritize major passable areas.
- The robot's initial position during mapping becomes default relocalization start point; power on/start near this point before tours.
- For noise and movable obstacles, erase with left mouse in "Edit Map" using MapEraserTool; use right mouse to add obstacles only when necessary.
- After mapping, do not close mapping page. Save map from app first, then close.
Feature 2 Save Map (migrated to APP side, refer to Save Map above)
After mapping, do not close scan window. Click "Save Map" in APP first, then close mapping page.
- After scene scanning is complete, do not close mapping page.
- Click "Save Map" in APP.
- Close mapping page only after successful save confirmation.
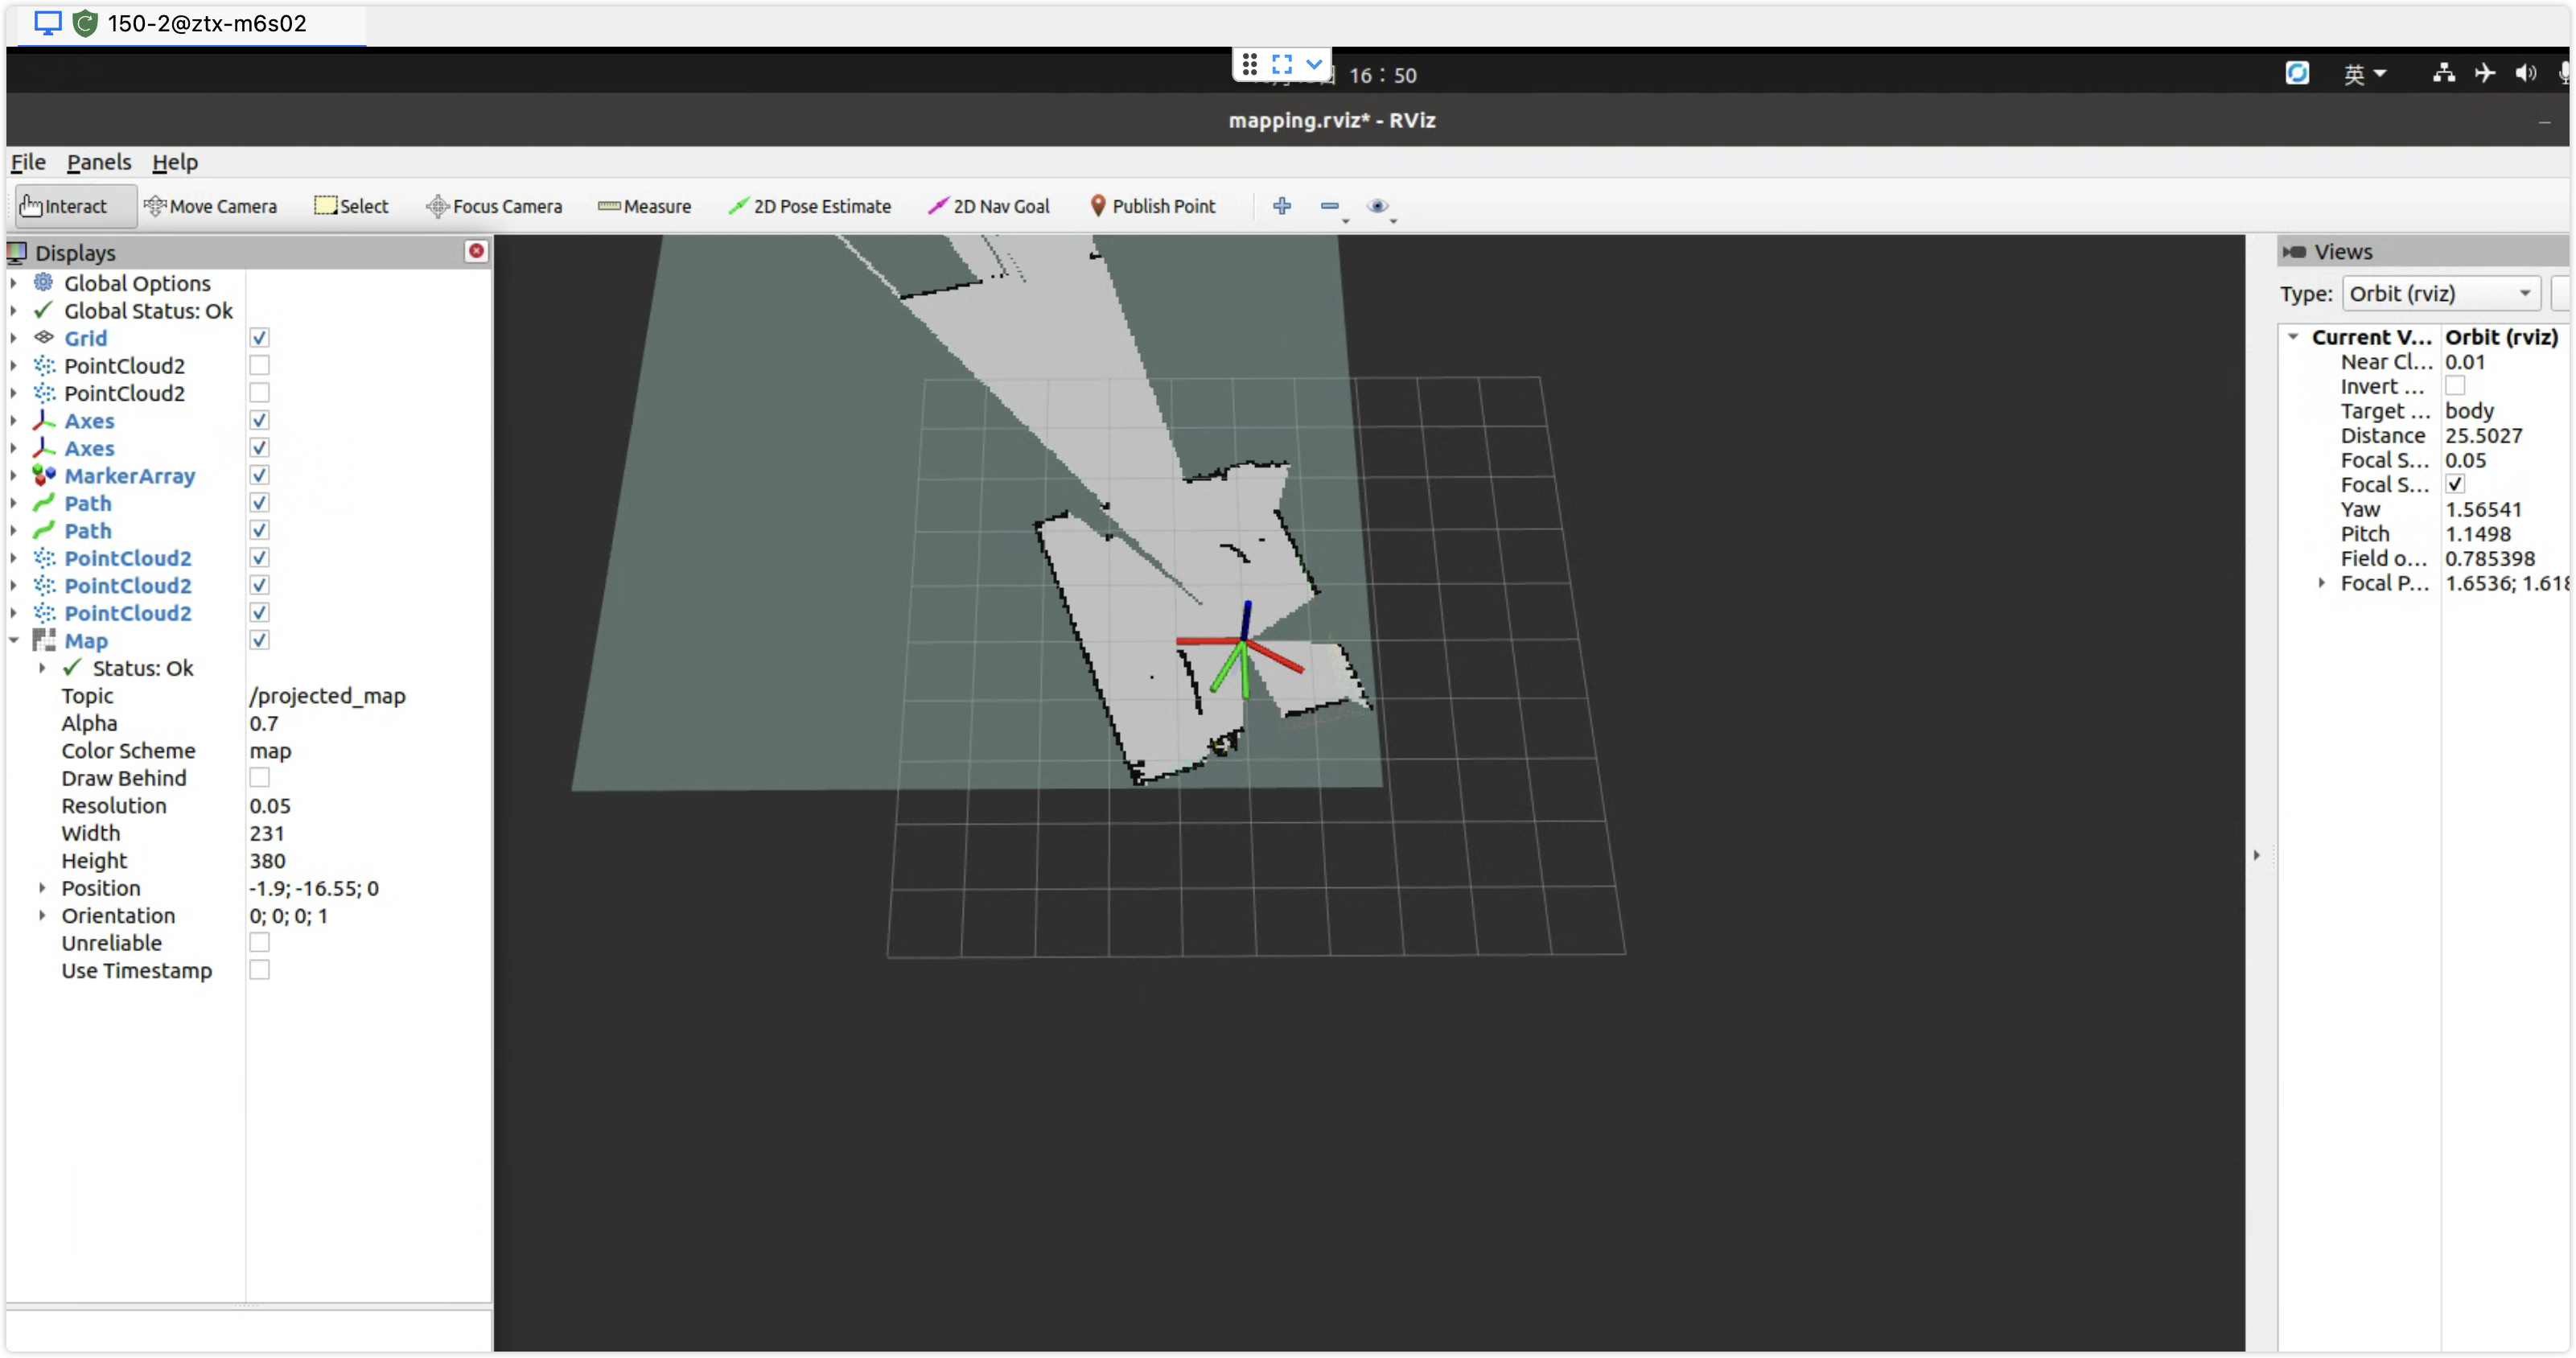
Feature 3 Edit Map (clean noise and movable obstacles)
After double-clicking "Edit Map" and entering the editor:
- Click Open Map and select target map.
Map path: robot/DaoLan/map/map (absolute path /home/ztx/robot/DaoLan/map/map).
- After loading, use MapEraserTool:
- Left click: erase noise and movable/incorrect obstacles (temporary objects, pedestrians).
- Right click: add obstacles only when needed.
- Keep fixed structures: do not delete fixed walls/columns.
- Shortcuts: Ctrl + + to enlarge brush, Ctrl + - to reduce; range 1~10 px.
- After editing, click Save All Files, then close after success prompt.

Feature 4 Start Navigation (double-click before every tour)
Before each navigation task, double-click "Start Navigation" on tablet desktop. After startup, move the robot in circles/paths to scan surroundings, and click 2D Pose Estimate multiple times until point cloud aligns with map boundaries.
11. Other Feature Entrances
Besides navigation, the Basic Applications module also provides:
- Face Recognition: recognize registered persons and execute corresponding actions.
- Dynamic Face Interaction: when a person or stranger is detected, AI proactively speaks configured content (requires voice interaction enabled first).
- Unitree G1 Robot Motion Choreography Quick Start Guide
- Fengyun Intelligent Control Face Recognition Quick Start Guide
- Dynamic Face Interaction Mode Quick Start Guide
Navigation Feature - Concise User Guide